Tuesday, December 27, 2011

An easier way to make homemade cinnamon rolls


If you received a bread machine for Christmas this year (or any year), here is a recipe you can't beat for cinnamon rolls without all the traditional mixing and kneading you have to do to make the darn things. All you need is a bread machine with a dough setting. If you are like me, you might be a bit tired of sweets so I think waiting for a few weeks to make this might be best, but this is a good recipe to try and a great way to put that bread machine to good use. The bread machine takes the work out of a hard job that I hate -- kneading!

The recipe.

Cinnamon Rolls 
(for the bread machine -- Rolls will not bake in the bread machine yet the equipment does the hard work!)

Dough:
1/2 cup warm water
1/2 cup milk (or almond milk)
1/2 cup butter (or margarine) softened (20 to 30 seconds in the microwave)
2 eggs
1 teaspoon salt
4-1/2 cups all-purpose flour (I don't use bread flour because it contains more gluten)
1/2 cup sugar
5 teaspoons yeast (or 2 packages yeast, not the quick-rise kind)
Cinnamon/Sugar/Butter mixture, recipe follows
Glaze, recipe follows


Add ingredients to the bread machine in the order listed above. I like to add the yeast on top of the sugar because I feel putting them together at first makes the yeast act more quickly.


Set the machine on the dough cycle and turn it on. Be sure to check to see that the ladle inside the bread machine is turning. Let it run through it's cycle. My bread machine's dough cycle runs for 90 minutes.


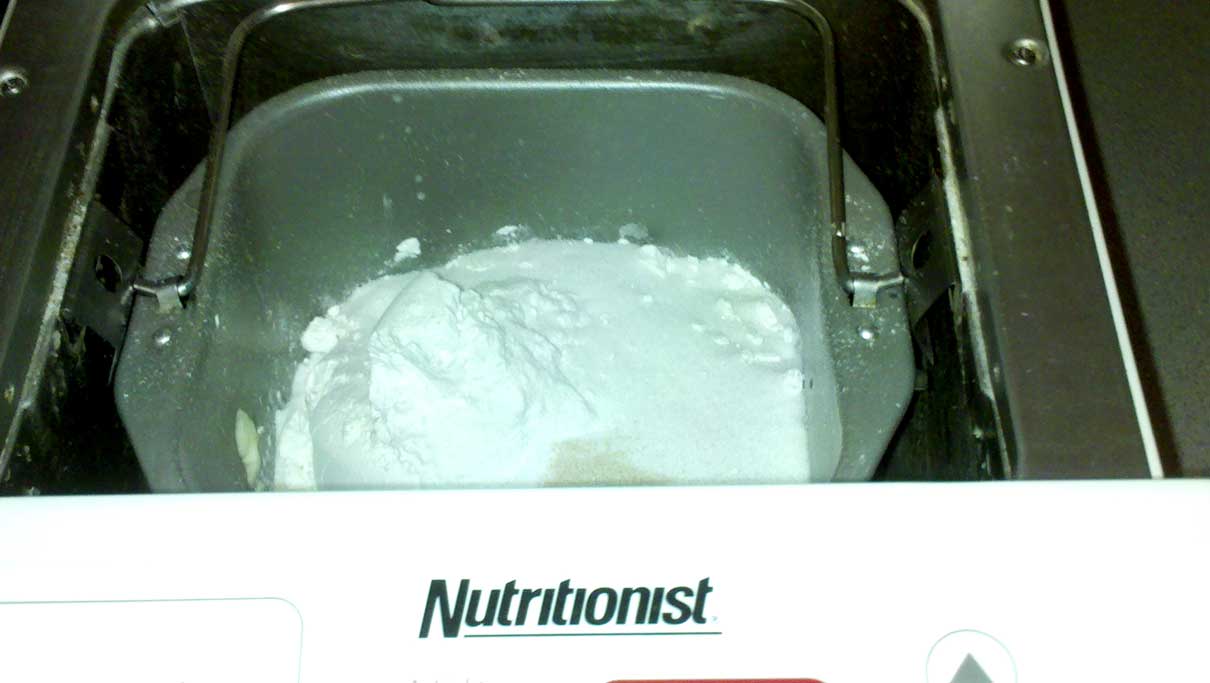
Two photos above, make sure the ladle is in place; an action shot of the bread machine doing it's work.


When the dough rises to the top, turn it out onto a clean surface and cut the dough in half. With a rolling pin or with your hands, flatten the dough and pull it out until it forms a rectangle.

Spread the dough with the following
Sugar/cinnamon/butter mixture:
1 cup sugar
3 teaspoons cinnamon
1/4 cup butter, softened

Use half of this mixture for each half of dough you prepare.


Roll the dough into a cylinder and cut into 15 equal slices. Place in a greased pan. (I use a large cake pan.)


Repeat with the second half of the dough until the pan is full. You will make 30 cinnamon rolls.


Allow to rise about 30 to 45 minutes until the rolls rise until all gaps are filled and are about an inch high. They will get a little bounce in the oven. Preheat the oven at 375 degrees and bake the cinnamon rolls for approximately 25 minutes or until they are nicely browned.

Make the following glaze and pour on the hot rolls.

Glaze:
1 box Confectioner's sugar
1/2 teaspoon vanilla flavoring
Milk (or Almond milk)


My family likes tons of glaze. If you prefer less, only make half the recipe. Pour the Confectioner's sugar into a bowl with a pourable spout, if possible. Add vanilla flavoring then milk, a little at a time, and stir vigorously until mixture is thin enough to pour but is not runny. Pour or ladle the glaze onto the hot cinnamon rolls.

Allow to cool. Store in an airtight containers or in two large gallon, plastic bags lined with Wax or parchment paper.

This may seem like quite a bit of work but if you have ever kneaded dough for five minutes to make rolls, this will seem like a breeze! This works for all kinds of rolls, too.

Thursday, December 22, 2011


I haven't posted all week and I do feel kind of bad about it but my husband had minor surgery and I had more duties than I expected in getting ready for Christmas. Today I am back with some last minute Christmas ideas.

Above is my new favorite Christmas tree topper from MyHomeIdeas.com. It's hard to imagine that I am still in awe of all the berries on all the hollies I see EVERYWHERE this year, but I am. This is so beautiful and if I have time, I will add some holly to my tree and all around my house. It's too pretty to pass up this year. It may never be this lovely again!


The simplicity of the table decor from MarthaStewart.com is striking. I love it! The Amaryllis is a beautiful Christmas flower but any red flower would work.


 I love the idea of wrapping gifts in useful kitchen and bath linens, also from MarthaStewart.com. This is a Japanese art I would like to learn.

 Thought I had found every kind of cupcake decoration there was? This from Michaels.com escaped my notice -- until now.


I really like this idea because -- well, have you priced the very popular photo cards? You would think that the volume of users would drive the price down but not so this year. With this DIY card you could pose for the shot and then print out the card and cut with an x-acto knife and insert the photo inside. Of course ordering cards might be less time consuming. This would be great gifting and it could later be framed. Neat idea from MarthaStewart.com.


Kids love to draw on things and I love these napkins, again MarthaStewart.com. There is still time for your kids to do this. It would help to keep them busy now that school is out!


And last from MarthaStewart.com, a favor tree. I love it. This is a great way to be ready when guests arrive. They can leave with a nice gift presented in an easy, yet decorative way.

Thursday, December 15, 2011

Good-for-you marshmallows


My daughter made these amazing recipe of homemade marshmallows and blogged about them. Here is the same information. These are marshmallows made for those that need to stay away from cane sugar and eggs. They were easy to make and they made our little fella who is allergic to a number of things and needs to stay away from foods that feed yeast, very, very happy.

This recipe may be made with agave nectar which has a lower glycemic index than cane sugar.

Here is what my daughter had to say:

Actually, these marshmallows are not only egg-free, but they also contain no cane sugar. They are made with maple syrup, but you could use agave or corn syrup according to your needs. They should stay refrigerated, and they are slightly gooey-er than the typical marshmallows, but the recipe I used said they work well for rice-crispy treats, which I plan to make soon.

The best part? They are super-duper easy!!

Egg-free (and sugar "free") Marshmallows

6 tablespoons cold water
2 envelopes unflavored gelatin
1 cup agave, maple, or corn syrup
1 teaspoon vanilla
1/4 teaspoon salt
Flour or corn starch

Add gelatin to water and microwave 30 seconds. Pour into mixer. Add syrup, vanilla, and salt. Beat with electric mixer for 12 minutes until the marshmallows are very thick and tripled in size. Pour into a 9x12 baking dish coated with cooking spray and dusted with flour or corn starch (I lined my dish with parchment paper and put a little corn starch on top). Let them cool in the fridge at least three hours or overnight. Cut marshmallows with a wet knife into squares.


When I first put the ingredients in the mixer I thought, "These are gonna be brown!" But they fluffed to a nice color fairly quickly.


The mixture globbed down into the dish, and I spread it with a rubber spatula. I didn't worry about trying to make them too "pretty" as I am just planning on using them in a recipe. It would be good to note that this would make a great marshmallow cream to add to a recipe without any other steps.


And this is the finished product -- not beautiful, but very tasty. My 6-year old allergic child was thrilled when I gave him a bowl-full!! I may make some Christmas shapes the next batch using cookie cutters.

The prettiest wreath ever


My sister surprised me yesterday with this gorgeous wreath. It is made from holly she found growing in her yard. I think it is probably the prettiest wreath I have ever seen.

A couple of weeks ago I posted photos of a wreath she had made earlier with some details on how to make one. I knew she was planning on making one for me but I am just blown away by how pretty it is. I am so proud of it and I really appreciate my sis for taking the time and using her considerable talents to make me this wreath.

This photo makes me realize how faded my front door is but it's not as bad with this beautiful wreath.

Thanks sis and Christmas blessings to you!

Tuesday, December 13, 2011

Old Fashioned Candy


This morning I had to be sneaky to get this photo? Why? Because I didn't want to bring attention to the large glass jar hidden in an obscure corner of my kitchen.

It is a jar brimming with "sugar plums" -- at least the visions of sugarplums I always see in my dreams. Old-fashioned candies like these chocolate drops, fruit candies and coconut bonbons. When I was a child, long before Christmas, my father would bring home an enormous sack filled with candy including his favorite -- chocolate drops and his next favorite, orange slice candy.

I wanted to mention this candy in my blog because I want everyone to know that you can still buy these old favorites that have delighted so many generations. The place where you can go to open a flood of memories is Arnall's Grocery in downtown Newnan, GA.

They have everything from old-fashioned soft peppermint sticks to ribbon candy to peanut butter treats and even chocolate covered raisins and pretzels. Arnall's is usually a favorite place of mine for garden supplies, but at this time of year I go there for candy. I am not sure how many candy varieties they have because I only bought our favorites this year. I tried to stay away from things that only I love.

Nothing peanut butter can come into my house because of allergies but our favorite is definitely the chocolate drops. My husband could eat his weight in those and usually does during December. I also love the bonbons and the cinnamon, peppermint and clove soft candy canes. That is why they are hiding in a dark corner. At this point I will leave them in plastic baggies and later I will take them out and pour them into a candy jar. I think the sound of the jar lid might deter some and the plastic bags take longer to get into.

At least that is my strategy to have some of these candies left for my candy jar later in December. I could also make another trip to Arnall's.

Thursday, December 8, 2011

Reindeer Cupcake


This cute reindeer cupcake is my last decorated treat. (I promise!)

Instead of icing I melted chocolate chips and spread the warm chocolate over the top of the cupcake. I used icing and M and Ms for the eyes and nose, The mouth is first a mini vanilla wafer and the mouth is drawn on with an icing pen. and the ears are made from a wafer that is cut in half then either put in the chocolate before it is cooled. The "antlers" are made from pretzels. They should be be cut with a sharp knife and shaped to resemble the antlers.

These weren't my favorite but kids really loved the friendly-looking confection.

Tuesday, December 6, 2011

More cupcake ideas


Use old-fashioned fruit slice candy to make the easiest cupcake decorations ever! These Christmas cupcakes, like the poinsettia one above is simple and striking. If you don't think you can use any of my previous suggestions for decorating cupcakes, you can be sure these are the easiest decorations yet.

All you need are some kitchen shears and fruit slice candy and iced cupcakes. To make each flower just cut a piece of candy horizontally in half to make two flower petals. You need five half pieces (2-1/2 whole pieces) and some small snips of green jell candy for the leaves. Cut some small yellow pieces and arrange in the center, top of the petals placed on top of an iced cupcake and you have made an easy poinsettia. This idea would work for any season or occasion. Just cut the shape of the flower you want to make.

Even a very small child can help to make this decoration. You will need to help with the cutting but after that, all that is needed is an imagination.


The holly cupcake above is just two holly leaves made from a slice of fruit slice candy and three red hot candies for the holly berries placed on an iced cupcake.

You can find these candies in most stores, usually in packages that contain a number of colors. I just made sure I purchased a bag that contained Christmas colors.

Thanks to Angela McRae who took these photos.

Monday, December 5, 2011


This morning I almost drove past this tree on my way to work. I checked the rear view mirror to be sure I wouldn't be rear-ended, and quickly turned into a parking lot to take a photo of this great tree covered with one of my Christmas favorites, mistletoe.

My son called one day last week and told me he was bringing by some mistletoe for me. He found some low-hanging mistletoe and wanted to bring me a bunch. Of course I was thrilled. I am hanging it and will be tying bunches together with red ribbon to hang in our doorways and to put in arrangements.


Mistletoe is one of those plants that is both universally loved and greatly maligned. It is very important in our forest ecosystems because it helps to feed overwintering wildlife. Birds, and some insects and mammals eat the berries and leaves to sustain them through the winter months.

Though we don't usually notice that mistletoe is growing in our trees until winter comes and the trees lose their leaves, we see the evergreen clumps all along the roadside at this time of year. I believe what I have seen in this area is the European mistletoe, native to Great Britain, but there are over 200 species of this plant worldwide. It is a semi parasitic plant and has a symbiotic relationship with the host plant, usually a tree.

It is generally thought of as a positive, rather than negative plant for trees because of the benefit to birds, though the mistletoe can occasionally be more of a pest if it grows to the point that it smothers and kills a tree limb. Mistletoe might be more beneficial if controlled rather than stopped, for this reason.

The plant is in the order Santalales (perfect), and like most other Christmas plants, with the exception of the Christmas tree, is considered poisonous to humans and pets, though how poisonous is disputed by some. I would advise against ingesting berries, leaves or tea made from the mistletoe plant. It should be kept out of the reach of small children and animals.

Mistletoe can be dried and kept indefinitely by hanging it upside down in a dry place. I have also read that it can be frozen and refrigerated to keep it like new for Christmas celebrations. I have not tried this.

Though the tradition of kissing under the mistletoe was, not surprisingly, started by the Scandinavians, Washington Irving made it a popular past time by writing that young boys would pluck a berry after luring a girl underneath the mistletoe for a kiss. Of course after all the berries are gone, the kissing must then end.

Mistletoe is a traditional "good luck"  plant as we see in this old postcard I found online and     I love the fact that mistletoe has been the state flower of Oklahoma since 1893, though they also have a state wild flower and a state rose. I can also remember my dad bringing home mistletoe and holding it over my mom's head while kissing her. It is still a great memory for me.


Today, if you goggle mistletoe, the most likely thing you will find is a video of Justin Bieber singing about kissing his girlfriend under the mistletoe -- not my favorite video. I am much happier with the YouTube video where Frank Sinatra sings, "Oh by gosh, by golly, it's time for mistletoe and holly."

I will leave you with that link. Happy Decorating!

Thursday, December 1, 2011

Holly Berry Wreaths


It is the perfect year to make a holly berry wreath! That is because there are so many berries. I have never seen anything like it.

I've read that the reason for this abundance of pretty red berries is because the weather conditions were absolutely perfect for berries -- and acorns. The rain came at just the perfect time. It was a bit dry later, but during the time the holly trees were making berries, we had plenty of rain.

Later though there wasn't as much rain, there was enough to keep a multitude of berries on the trees and growing.

My sister made this pretty wreath and she sent me these photos of her progress.

On thing you MUST do when working with holly is to wear gloves.


This wreath was made from a plastic wrapped hay wreath. She added picks onto each small holly branch by attaching florist picks with wire onto each holly cluster and inserting them into the straw wreath. She began with the outside of the wreath and filled in with holly in a circular pattern, until all of the holly covers the straw wreath. (Above is a photo of the wreath with holly cuttings inserted into the wreath using florist pics.)

I don't think I would say it is easy because I know it took hours of meticulous work to wrap all the holly cuttings with pick wires and floral tape but the results are just beautiful.


I wouldn't mind having one either. She did a great job.

Wednesday, November 30, 2011

Pumpkin Pie with Shortbread Cookie Crust and Marshmallow Meringue


For Thanksgiving Dinner I made a pumpkin pie for my grandson who must be on a wheat and dairy-free diet. I have made a number of crusts for pies without using wheat, and I must say they have gotten mixed reviews.

Then the other day, my friend Bonnie asked me what I would use for a pie crust and she mentioned that her daughter, Brooke, was thinking about using a gluten-free cookie crust and I thought it was such a good idea that I decided to try it myself. We loved it. The cookie mix I used was the Bob's Red Mill Gluten-free Shortbread Cookie Mix.

I mixed it up using half the package of cookie mix, 1/2 cup margarine and enough cold water to make it a stiff dough. It was easy to do and worked really well. It even rolled out without breaking all apart. I will say that it needs to be rolled thinly because this crust will rise just a bit, but since it is a shortbread and lighter on leavening it works better than many cookie recipes.

The crust was flaky enough and had a mildly sweet flavor -- perfect for a pumpkin pie.

Coconut milk, brown sugar, pumpkin puree made up the pumpkin pie and the topping is a small jar of marshmallow creme, heaped on top and baked to a golden brown. Regular marshmallows could have been heaped on top of the warm pie and baked but I wanted to try the marshmallow creme. It worked well and gave the pie a more exciting flavor than an egg-white meringue. Who doesn't love melted marshmallows, right?

Pumpkin Pie with Shortbread Cookie Crust and Marshmallow Meringue

Crust
1/2 package Bob's Red Mill Shortbread Cookie Mix
1/2 cup butter, trans fat-free margarine or coconut oil
Cold water
Potato flour for rolling out pie crust

Mix together cookie mix and butter, margarine or coconut oil with a pastry knife. Mix in cold water until dough is formed. Pour out onto parchment paper cover with potato flour. Roll out thinly and place into 9.5 inch deep dish pie plate.

Pumpkin Pie

1 can pumpkin puree
1 cup coconut milk
3/4 cup brown sugar
1/2 tablespoon cinnamon
2 eggs
1/2 teaspoon salt

Pour into unbaked pie shell and bake at 350 degrees for one hour or until pie is firm to the touch.

Marshmallow Meringue

1 small container of Marshmallow Creme.

Spoon a small container of Marshmallow creme (for a larger meringue, use a larger container of marshmallow creme) onto top of warm pie. Bake at 400 degrees until top is browned, approximately 5 minutes.


Tuesday, November 29, 2011

Easy Mexican Corn Bread Muffins


I love old-fashioned corn bread but sometimes my corn bread turns out great and other other times it is dry. I usually prefer cornbread that is savory and not sweet. The only exception to that is Jiffy Corn Bread Mix. It is cheap and I can't seem to mess it up -- no matter how hard I try!

The other day I decided to make some Mexican cornbread to go along with chili. Rather than use my usual Mexican Cornbread recipe that takes a long list of ingredients and even more time, I decided to try something much easier.


I bought two boxes of Jiffy Cornbread Mix and mixed them up according to the directions on the box. To that I added 3/4 cup of chopped green onions and a cup of mild salsa. I spooned the mixture evenly into two, twelve-count muffin pans, sprayed with baking spray.

It was then baked according to directions and everyone really enjoyed it. It made 24 muffins and was fast, easy and good.

Plus, I have never had a bad batch of these muffins. As I said, I personally would prefer corn muffins that don't have any sugar in them. These are slightly sweet and very light. I always have plenty of compliments on my cornbread when I begin with Jiffy and that it what is most important. When I make them from scratch, I have rarely had a compliments. I have to go with a sure thing.

There are just a few more suggestions: First, if you use hot salsa you will have a spicier muffin. I used mild salsa because I wanted to make muffins everyone would like. Sometimes hot peppers in food can turn people off.

If you add a can of corn to the batter, you can eliminate all or half of the liquid. It might be better to bake it in a pan or skillet, rather than as muffins because it will bake up a very moist cornbread.

Also, you can go to Jiffymix.com and sign up to receive a free Jiffy Corn Bread cookbook. Mine is in the mail.

Sunday, November 27, 2011

We have made broccoli!


 I am so excited about our most recent garden crop. We have the most beautiful broccoli I have ever seen. Above is the broccoli my sister picked for Thanksgiving.

The other day while in the garden I said, "Look, we have made broccoli!" -- like Tom Hank's in the movie Cast Away. After building a fire, he said to his soccer ball, "I have made fire!" as if he was the original discoverer of that element.


This was our first successful broccoli, so it is understandable, (I think) that we should be quite excited and proud that we finally were able to grow broccoli after many futile attempts. I will give God credit for the original discovery but I admit I feel quite proud and thankful for our success. It is nice to know that planting it in the fall is the best time for broccoli. We may even have another crop in the spring. We are keeping our finger's crossed.

My sister made the absolute best broccoli casserole for Thanksgiving Dinner and we both think it was partly the cook and the rest -- having very fresh and organic broccoli.


Also in the garden, our Brussels sprouts -- nothing is sprouting yet. It will be spring before we have Brussels sprouts. Behind them are the collards that I think are a bit behind in their growth. The rain will probably help this week.


Our kale is finally beginning to grow.


And our turnip greens look a bit ragged. We need to get in the garden and pick some greens this week.

I am just glad we have something to show.

Monday, November 21, 2011

Chai Pumpkin Bread


Everyone in "blog land" has a post about pumpkin bread! It's almost like the lowly pumpkin has just been discovered. I read a blog that said that "everything is better with pumpkin in it," and I think that is not quite a complete statement. I would say everything is better with cream cheese, bacon and pumpkin. Pumpkin is the healthiest of those three so that is probably the reason for the sudden discovery and it makes a very moist batter bread that goes well with tea in the fall.

Pumpkin can also be substituted in recipes calling for carrots. It makes a yummy rich pumpkin cake using a carrot cake recipe. This recipe, below, has 1/2 cup of chai tea was very good. Was because it is gone since I very nearly didn't get a photo of it. I made three smaller loaves and gave two of them away. My family then devoured the last loaf.

Chai Pumpkin Bread

3-1/2 cups all purpose flour
2 teaspoons baking powder
1 teaspoon baking soda
1 teaspoon salt
1-1/2 tablespoons ground cinnamon
2 cups sugar
1/2 cup light brown sugar
4 large eggs
1 cup canola oil
1 15-oz. can pumpkin puree (not the pie mix)
1/2 cup strong chai tea (I used my favorite, Bija Rooibos Chai)
1 teaspoon vanilla flavoring

Preheat your oven to 350 degrees.  In a larger bowl, combine all the dry ingredients until well mixed. In a smaller bowl, mix the wet ingredients. Pour the wet ingredients into the dry ingredients and still until just mixed. Pour the batter into two 9 x 5 x 3 inch or three 8 x 4 x 3/5 inch greased loaf pans. Bake for approximately 45 minutes or until top is firm. Allow to cool.

You may drizzle with a topping made with a cup of Confectioner's sugar, 1/2 teaspoon vanilla flavoring and soy milk or regular milk added by the tablespoonful until thin enough to pour onto the tops of the pumpkin bread while still warm.


My Very Berry Tossed Salad


Last Thursday was our Thanksgiving feast at work. It was tantalizing to walk through the building to see what each person brought. The smells alone made us quite hungry. I did not outdo myself because I decided I wanted to just bring a spiced up tossed salad. I was glad I did because a number of people told me how much they enjoyed the salad and I liked it too. It was nice to have something a bit lighter with all the heavy foods.

It was easy because I found some of the berries on sale and found a salad dressing that was perfect. It was a little pricey, but like homemade. I loved it.


I hadn't seen Maple Grove Farms of Vermont salad dressing in my grocery store before. I have purchased their maple syrup and I liked that product, but as I was walking in the salad dressing isle, I looked up and on the top shelf there were some specialty salad dressings. I was looking for a salad dressing that had berries in the ingredient list. I wasn't so sure about this one but I decided to try it. I will tell you it is wonderful and so fresh. It doesn't have that bottled salad dressing taste. I find it hard to explain but most salad dressings have a bit of an aftertaste to me. This one was perfect and was the perfect dressing for my Very Berry Tossed Salad.

I will buy this dressing again, but only on special occasions because it was yummy, but expensive. I think it would make a perfect side for Thanksgiving dinner!

Here's the easy recipe:

Very Berry Tossed Salad

1 large package mixed salad greens (pre washed)
4 stalks celery, cut into thinly sliced pieces
1 small package (4 to 6 oz.) blackberries (or more)
1 small package (4 to 6 oz.) blueberries (or more)
1/2 package of dried cranberries (Approximately 1/2 cup)
3 ounces basil and garlic flavored feta cheese (broken into small pieces)
1/4 cup raw walnut pieces
Alfalfa sprouts
Maple Grove Farms of Vermont Strawberry Balsamic dressing

Fill a large salad bowl with salad greens. Sprinkle on half of the celery, fresh berries, cranberries, feta, walnuts and sprouts. Fill the bowl to the top with salad greens. Sprinkle on the rest of the ingredients in the same order. Store in the refrigerator until ready to use. Gently toss salad and serve with Maple Grove Farms Strawberry Balsamic salad dressing.

Easy, healthy -- a wonderful treat!

Thursday, November 17, 2011

Snowman cupcakes


This was probably the hardest cupcake I decorated for the 2011 November/December Issue of Newnan-Coweta Magazine. The decorations are made using marshmallows, toothpicks, fruit roll ups, sugar stars and melted chocolate chips.

I first piped icing all over the top of the cupcake. If you will notice, I didn't worry about covering the entire cupcake. I was planning to keep these in a covered container so they shouldn't dry out.

I then took a toothpick and pushed it through the center of one regular-size marshmallow, into the center of a second marshmallow. I secured these marshmallows to the center top of the cupcake, using the bottom part of the toothpick. If your toothpicks aren't large enough, try a wooden skewer and cut it off the length that is needed to fasten the marshmallows securely to the top of the cupcake.

I used green fruit roll ups to make a cap by wrapping it around my largest finger and twisting the top together and fitting the "cap" onto the top of the marshmallows. I trimmed some of the roll up away with kitchen shears if it looked too tall.

I then fashioned a scarf around the snowman's neck with a long strip of blue roll up.

I made a carrot out of a piece of red and yellow roll up mashed together.

Next I melted the chocolate and poured it into a small decorators' bag. Using a small round tip. I added the eyes, and mouth with dots and then drew on the arms with chocolate.

I think they are cute.


The blue sugar stars around the outside edge completed the decoration.

Kids would enjoy helping to make these miniature snowmen. They weren't hard to make.

Wednesday, November 16, 2011

Thanksgiving ideas

Have you ever used Pinterest? I use it to find ideas for decorating, cooking, crafts and even sometimes for work. I love to find new and creative ideas and keep them at my fingertips. That is why I joined Pinterest.com and I use it almost daily. Here are some of the Thanksgiving ideas from Pinterest. Some I will use and some I just like -- maybe for next year.

I like the little pilgrim hats above from Amber Engelke. I think I could make them gluten-free and dairy-free if I could find some cookies that are similar -- or I could just dip the entire cookie in vegan chocolate chips. Very cute.

This turkey from blogs.babycenter is great because kids can go out and find their leaves and then paste everything together.
These pies from cooking.thenerdswife.com are very pretty. I have cooked custards in little glass canning jars like this but never a miniature pies. I heard that mini pies were going to be big and here is a low-budget, reusable "pie dish" for you.

Oh my goodness! Pumpkin cinnamon rolls, and they are vegan pumpkin cinnamon rolls. I will be baking these for Thanksgiving! Many thanks to eatprayrun.com for the recipe.
 I love this Turkey Pear Salad that any kid could make. familyfun.go.com is famous for charming ideas like this one. I don't know what to use for the feet but I'll bet I could find something healthy and fun. These folks are so creative.
Speaking of healthy and fun, livinglocurto.com made this vegetable tray made from all the right stuff -- that is adorable. If you can't get your kids to eat this they are turkeys! Just kidding, but you should be able to get kids to bite.


 I like this simple tree from familyfun.go.com. It's as simple as getting a small branch and cutting out colorful leaves. Add what you are thankful for and it will be a great Thanksgiving creation.

Last year we were Indians, so I think we should give the Pilgrims equal time. I think these Pilgrim hats would be easy, too. They are from marthastewart.com.
This -- or something similar to this will be hanging on my front door come Thanksgiving morning. It's from marthastewart.com and is so lovely -- and easy.
Turkey pinwheels! What a great idea! We WILL be making this. I think we will use scrapbook paper which is a little stiffer than regular paper. You can find find the instructions at parents.com.

I don't know if we will do this but it is so cute from sheekshindigs.com. It would be a great thing to make and would make the table setting a sheek shindig!

I have so many napkins in sets of 4 and 8, but not a set large enough for every Thanksgiving guest. If I used a DIY napkin ring like this, it wouldn't matter if my napkins don't all match. These are very cute -- and not even ironed and I like them very much. Thanks twoshadesofpink.com for opening my eyes to the possibilities. I don't need new napkins just something to decorate them.

Hope these ideas will inspire you as they have me.