Wednesday, July 31, 2013

My marathon weekend


Last weekend my daughter and I spent our entire weekend marathon-cooking.

We cooked from mid-day Friday till bedtime.

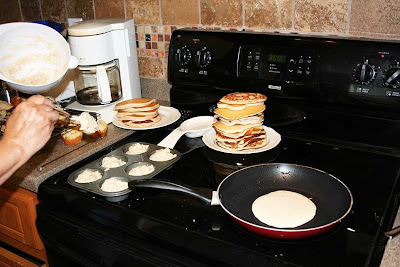
The next morning we woke up at the crack of dawn--well maybe I am exaggerating a little, but we cooked from early Saturday morning until about 9:45 pm when we just couldn't do any more. Above are some of our more successful attempts at making pancakes and muffins on Saturday.


We spent at least half a day on Sunday trying to wrap things up and I came home with a list of things to finish. I am sure my poor mixer was glad for the rest!


We messed up SO many dishes, measuring cups, spoons, bowls and we came up with some very good recipes and plenty of not so good things that had to be trashed.


For example, the above photo shows an attempt at hamburger buns. I know they look a bit like cauliflowers gone bad and after a taste test, were declared a failure.


This pie looks like of pretty. The crust was way too heavy but the berries were good. After a couple of tries we made the recipe worse so my assignment is to bake a better pie crust.


We did make a successful banana bread. This one was a keeper.

We are not trying to win a cooking award, we are trying to finish a cookbook and right now I have the utmost respect for every cookbook author out there!

Our book will feature gluten-free recipes with a southern flair and right now I can't wait until it is completed. I have tasted and trashed more food than I thought was possible and we have some great recipes and some that aren't quite there yet. I know that if we continue to plug away at it we will have something we will be proud to be a part of--at least that is my hope.

Tuesday, July 30, 2013

Gerald Johnson, Master Gardener/iris and daylily grower


Gerald Johnson and his wife Dianna visited Crossroads Garden Club last Monday and talked about his passion for gardening, and gave us useful tips to successfully grow bearded irises and beautiful daylilies. Gardening wasn't always a passion for Johnson. Having been "raised" on a farm, he vowed that when he grew up and left the farm, he would never return.

Thankfully, that didn't last for Johnson because he has become a landscaper and a  Master Gardener with Cobb County. More recently, Johnson moved to Carroll County where he continues run his landscape business, along with both an iris farm and a daylily farm. He also has become a hybridizer of daylilies and should soon be selling his own varieties of daylilies, maybe some in the color of your favorite sports team.


Johnson began by telling use some helpful facts about irises. He is not only an expert, but is the past president of the Georgia Iris Society and has over 30,000 varieties of bearded irises.

Johnson's tips:

Never mulch irises. They need dry feet (or roots) or they could rot. Mulching holds the water in.

They don't like to be crowded, so don't hesitate to dig some up and move them when they grow too closely together.

Irises are sun lovers. They need plenty of sunlight, especially for the next next growing season. That doesn't mean they won't grow under hardwoods. Hardwoods lose their leaves and allow sun during the time buds are forming--which can be enough sun to successfully grow irises.


Irises Must have the proper fertilizer which is 6-12-12. Irises don't need a fertilizer high in nitrogen.

Fertilize them 60 days prior to blooming which is the end of March.

Correct fertilization will directly effect the size of the bloom.


The best time to move irises is July through October.

For companion planting Johnson suggest finding plants that won't crowd the irises and don't need too much watering.

Groundhogs and armadillos can dug up and destroy irises. Johnson had photos to prove this and suggested a large dog to keep similar pests from digging up iris roots.

Johnson has both a spring and fall sale for his irises and daylilies on his Carroll County farm.


Johnson is also a daylily hybridizer. He expects his first named varieties to be offered for sale this fall.


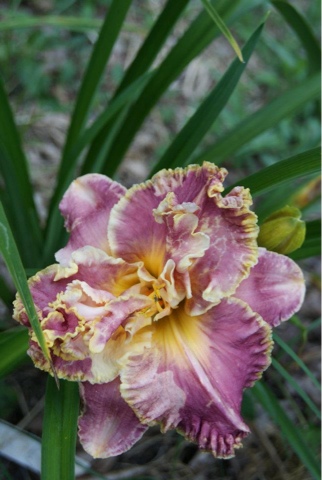
One popular attribute of daylillies are ruffles.


Johnson will be naming many of his new daylily varieties after sports teams because of the colors. One similar to the daylily above will be Tennessee Cheerleader.


Daylilies are easy to grow but are loved by both rabbits and deer. In fact, the flowers can also be eaten by humans and are good on salads. Johnson hasn't found too many ways to protect his daylilies from non-human predators.


Besides color, Johnson grows daylilies with enormous showy blooms.

Johnson was a great speaker and we appreciated him for his humor and obvious knowledge.

The next day after hearing Johnson's iris tips I removed all the newly placed pine straw from around my crowded iris bed. I am also looking for some 6-12-12 and i am thinking about where I need to move a few of my irises.

Photos courtesy of Dianna and Gerald Johnson.

Wednesday, July 24, 2013

Charlotte's popcorn


You might know Charlotte Nelson as the "Straw Bale Lady." I know I have mentioned her enough. Besides being a great person and true friend,she is a person who has creative ideas that inspire me.

The photo above is just one example. Charlotte wondered if Orville Redenbacher popcorn (which is incidentally very good) would actually grow if the seeds were planted. The answer is a resounding YES! However, Charlotte found out a few more facts about the popular corn product than just that it will sprout and grow.

First it is way taller than she expected and each giant stalk is growing and producing beautiful ears of popcorn. The biggest surprise is the fluffy, fuzzy, bright pink silks topping each ear. Such a pretty and bright color!

If you ever wondered why this is great popcorn--it's because it begins with a great product.

I am glad to know this but I am happier because Charlotte has shown me that I don't just need to look at the seed store to find seeds. Sometimes, a great product or idea might just be on my kitchen shelf and if I like it, why wouldn't I just try growing it myself? If I did, I might just have some great popcorn--always on my kitchen shelf.

I'm looking forward to Charlotte's next great idea. If it's as good as the popcorn idea, I am already excited about it!

Tuesday, July 23, 2013

Black and Blueberry Cobbler


When I made my mixed berry cobbler over the weekend, I didn't expect it to be quite so tasty. I think the berries, half blackberries and half blueberries enhanced the favors if both berries. I do think the flavor of the blackberries was a little stronger and I do love blackberries better so it suited me just fine.

The pie I made was about the size of three double-crust pies so if you triple the recipe below (which I did) you could duplicate my pie. I intend to make it again soon but I can guarantee it will just be one regular-sized pie.
Black and Blueberry Cobbler
Crust: Makes a double crust ( or use a prepared crust purchased  from a grocery)
1 cup of butter, softened
2 1/2 cups all-purpose flour  
1 teaspoon salt
1 tablespoon granulated sugar
1/4 to 1/2 cup of ice water

Mix butter until it is soft. 
Add flour salt and sugar and mix well with pastry knife. Mixture will clump together and have a grainy appearance. Add ice water by tablespoons cup of ice and mix well. Add more water as needed until the mixture forms a ball. Store in the refrigerator for a few hours. Roll out on a floured board. It would also make two 9" pie crusts. (This pie crust doesn't have to be rolled really thin to be good.)

Cobbler

Double pie crust
3 cups blackberries
3 cups blueberries
3/4 cup of sugar
1/3 to 1/2 cup of all-purpose flour or 3 heaping tablespoons corn starch
1/4 cup butter, cut into small pieces


Divide dough into two pieces with one larger than the other. the large piece of dough will bethe   oftom crust and the small one the top crust. 
way. Without the bottom crust.  Mix the blackberries, sugar and flour or corn starch in a mixing bowl, until berries are well coated. I like plenty of fruit. If my pie isn't heaping on the top, I add more fruit. Pour mixture into baking pan. Add the pieces of butter over the top of the fruit mixture. Roll out the top crust and place on top of the mixture. Press sides and top of dough together. Cut slits in the top. Bake at 325 degrees for about twenty minutes and turn the oven up to 375 degrees. Bake for forty minutes more or until pie is golden brown. Remove from oven and serve immediately with ice cream.


Sunday, July 21, 2013

Our family fish fry


On Saturday our cousins got together at my sisters house for a fish fry. Around forty cousins, relatives, friends and neighbors gathered to eat fish and visit with each other. My cousin, Alan, above left, caught the fish and he, my husband and a few others worked to cook them up perfectly.

We served fish filets, hush puppies, French fries and slaw and everyone else brought side dishes and desserts.


The day was perfect. It threatened rain but we only had sprinkles and cool breezes.


My desire was to take beautiful photos of everything but I was stuck picking up folks, making sure my pie was done, everyone had what they needed and the ice cream freezers were filled with ice and rock salt and were churning ice cream while everyone visited.

When I should have been taking photos, I was either visiting, finding something for the cooks, or helping to prepare things for our guests.


That is why I didn't get the right photos of my black and blueberry pie until it was almost gone! I didn't expect it would disappear so quickly but by the time I moved in for a small serving there was hardly anything left. It was baked in my granny's large pie pan which has been holding pies for our family for more than 100 years. I will share that recipe later.

It was a very nice party and I felt blessed that so many cousins and friends could make it and we had such a good time with each other. We also were blessed that the weather cooperated for us. I hope we continue to have these get together a as often as possible.

Wednesday, July 17, 2013

Prize fish and a fish fry


My sister sent me a photo of this fish caught a couple of days ago in her lake. It weighed 10.8 pounds and the gentleman who caught it was understandably thrilled! My husband who has been fishing there hoping to hook this fish or one of her relatives, felt his fish should have been his and was a little disappointed.

We have been working this week to get ready for a big family fish fry. My cousins are getting together on Saturday and we will get out the fish fryer and cook piles of fried fish, hush puppies, French fries, slaw, blackberry pie and peach ice cream. We'll wash it all down with gallons of iced tea and have a very nice visit. Get togethers like this are the perfect occasion for friends and family on warm southern Saturday afternoons. I plan to take plenty of photos to share.

Tuesday, July 16, 2013

My dad's hot pepper sauce

It's pepper sauce time. Jalapenos are beginning to come in and since I didn't can any peppers last year and my cupboard is bare, it is time to start canning. One of the reasons I didn't pickle any peppers last year is because all of my peppers were mild. This year they are hot and my family can't wait for me to start canning.

I grew up using pepper sauce on my greens--especially turnip greens. My father was the pepper sauce maker. He took great pride in his pepper sauce and worked hard to perfect it.

Here is his recipe in his words. I just dusted it off to have it ready. It's easy and everyone loves it.

Edgar's Hot Pepper Sauce

1 cup salt
1 cup sugar
2 tablespoons mustard seed
1 gallon distilled vinegar

Stuff hot mason jars with hot peppers of all kinds. I use jalapeno, banana, and cayenne. Do not use habaneros. Boil sauce and pour over peppers. Boil lids and rings and seal jars. Serving Ideas: Especially good on turnip greens, collards, garden peas and butter beans. The best I ever made was with all red jalapenos. Sometimes I also add the last of the green cherry tomatoes in with the peppers. They are good on nacho chips, covered with cheddar cheese and placed under the broiler until the cheese melts. Hot and flavorful.

Monday, July 15, 2013

My favorite pimiento cheese


During summer months or when I travel, I always make pimento cheese to take along. There is absolutely nothing like it. I used to like the pimento cheese I found in the dairy case at the grocery store but now I am hooked on this pimento cheese recipe I make myself. It is low calorie and tastes like summer to me. I think it is the fresh herbs.


Herbed pimiento cheese


1/3 cup nonfat plain yogurt, softened

1/4 cup low fat mayonnaise 

4 ounces nonfat cream cheese 
1/3 cup nonfat ricotta cheese
2 tablespoons finely chopped green onion
2 tablespoons finely chopped parsley (or other herbs of your choice)
1 seven-ounce jar of pimentos, drained
12 ounces sharp cheddar cheese, grated 
Salt and pepper to taste


In a bowl mix the yogurt, mayonnaise and cream cheese and ricotta together until smooth and creamy. Add the onions, herbs and pimentos. Add the grated cheddar until well mixed. Refrigerate for at least 2 hours before serving so the flavor will be enhanced.

Thursday, July 11, 2013

Mosquito Plants


I now have a little bitty mosquito plant! I got it at the plant swap a attended a couple of months ago at the Peachtree City Garden Club. I am hoping my little plant will grow to be as big as my daughter's plants, pictured above. Below is the original post about her plants. I am glad I have this "pass along plant" and I hope to transplant several of them to help with mosquitoes on my back deck.

From last year:
 My daughter moved last summer and some of our wonderful friends from church gave her a couple of mosquito plants for her deck as a going away preset. It is actually a member of the geranium family and if you brush the leaves, they release a citronella fragrance that is very pleasing.


The leaves are shaped a bit like geranium leaves but they are kind of rough and prickly and it is a plant that has done really well in hot and dry weather. This year has been a true test for potted plants because it has been so hot and dry. It's a great plant for any deck that is not shaded.

Does it repel mosquitoes? I would think it does because the odor is exactly like citronella extract. I haven't seen any bugs on the plant and I would think it would at least be a help for insects that are don't like the smell. I don't think any kind of citronella candles will keep them away if there is an infestation. But, even if this plant didn't do much to keep the bugs at bay, it would matter because it is a great smelling plant.

I do know that it is a semi-tropical tender perennial and will have to come in when the weather changes. I don't think it will survive a frost but it should live inside through the winter. Meanwhile I just love it when the leaves flutter in the breeze because I like the lemony smell of citronella.

Tuesday, July 9, 2013

Getting ready for a vacation


 Sometimes, things need to be repeated. Here is an old idea I am dusting off to reuse because lately I have felt so disorganized. Hope you like it.

Here's an idea I saw on one of my daughter's "Pins" on Pinterest. Want to make sure you have everything you'll need on your next trip or vacation? It seems like I always forget something, especially between my husband and me. We have forgotten everything from soft pillows to underwear. We usually have to go out and buy something and even if it is just toothpaste. It is frustrating to have to go shopping for something like that when we could be having fun or lying on the beach.

The solution is to start now with a printed list like this one and just check off the things you need. This list is from Brian Sibley's flickr account and is easy to download and print. I saved mine as a pdf and now I can just print what I need. I will check it out on my next vacation trip in the not too distant future when I spend a weekend at the beach with family.

I like this list because it first makes you think about what the special event will be (My special event--relaxing on the beach which means light packing, but for a something like a wedding it can get complicated.) It then reminds you to check the weather and temps. After that you just will need to check all the items you will need for travel.

Stash it in your suitcase and double check the items on the return trip to make sure you didn't forget something. Easy-pea-sy.

I think I am going to make a number of copies and file them in my desk drawer. Just click on the link above to download your copy.

This is great for a person like me who would love to be organized but really isn't. Happy traveling. This list should help!

Friday, July 5, 2013

Gluten Free cookies


In the grocery store the other day, I was looking for gluten free cookies for my grandson's upcoming visit and I will admit to being rather depressed when I saw the price of ready made GF cookies. I picked up two packages of cookies and the total cost--$12!

Then I put those cookies down and decided to try an easy GF chocolate chip cookie mix. It was a bit pricey compared to the regular cookie mixes. This one was $4.69 at Kroger. However it was much cheaper than the ready made variety. Even when I figured the cost of butter, an egg and a teaspoon of vanilla, I thought the price was SO much better.

So what was the verdict? I really like this mix. The cookies taste "homemade from scratch." I thought the cookies didn't really taste very gluten free--in fact they were quite yummy. The mix was easy. I just used a wooden spoon to mix and my kitchen still smells wonderful after the cookies were baked. I think the mix was a great idea. It doesn't make quite as many cookies as a regular mix but I baked about three dozen cookies.

All in all, a good experience. I would make them again--the last test is my grandson and I believe he will approve.

Thursday, July 4, 2013

Happy Independence Day Everyone!


I love old vintage posters and I also love Americana art. These old examples were on Wikicommons--things in the public domain. I always say I want to use some of these old drawings as greeting cards. The one above was a July 4th poster from 1918. Even though World War I ended in 1918, it wasn't until November of that year. This poster was a celebration and also a positive message.


 John Lewis Krimmel created this painting of the Philadelphia July 4th celebration in 1819. It looks like a jovial celebration with the greeting of a soldier on the left, a little boy sneaking a drink under the table in the center, a couple of soldiers in different uniforms celebrating and what might be a person signing a petition or campaigning on the right. Looks much like celebrations we have today. Obviously the fireworks came later in the day.

Have a happy and blessed Independence Day celebration!


Wednesday, July 3, 2013

Blanching and freezing green beans


I can't really remember when I learned to "put up" or freeze green beans. I remember watching and then helping my mother stock the freezer with a winter's supply of them from a very young age. I can't really remember not knowing how it was done.

Preparing the beans was not my favorite chore. We would take a mound of beans, string them and then break them in small pieces and then wash them. Above is a sink full of green beans ready for washing and blanching.

I usually wash them at least twice or until the rinse water looks clean after washing them.


The green beans are then transferred to a pan and covered with cold water. I turn the burner on high and wait for the green beans to turn bright green--which means the beans are not cooked but heated until they are a temperature that keeps them from maturing any further so the optimum taste can be preserved.


I watch them closely because if they get too done, they can become mushy when cooked. I love therattlesnake beans because the red stripping disappears when they are ready and they become a bright green color.


Usually they are just beginning to boil when done.


I remove them from the heat and get ready for the next step. Draining them and cooling them quickly.


I pour them into a large colander and drain off the hot water. Meanwhile I fill the sink with cold water.


 And add ice.


 I dump all the beans into the water until they are cool and then transfer them back to the colander to drain.


See they are the perfect color. If you wish, you can spin them in a salad spinner to drain off the water. I don't do this because I always add a little water to the beans when I cook them. If there is water in the frozen beans it usually doesn't matter too much. I just add less water in the cooking.


I then load up the freezer bags with green beans and label the package with the contents and the date. I immediately take the bags to the freezer and stack them as neatly as possible. I don't usually disturb them until I need to cook them--usually for a dinner meal.

When I need the green beans, I take them out of the freezer and put them in a large sauce pan. No need to thaw. I turn them on high until they are defrosted and then cook them on medium until they are just the way I like them. I might add a tablespoon of olive oil to the pan and salt and pepper to taste. We always love our fresh green beans. They are the closest thing to fresh you can get and last year I had just enough green beans in the freezer to last until our new crop came in.


Tuesday, July 2, 2013

4th of July ideas


Over the weekend I noticed that my neighbors were putting up some decorations for the Independence Day celebration. I think it is always a good thing to at least put up Old Glory to show a spirit of patriotism on this holiday. I usually don't do more than that but it is a very good idea to at least fly the red, white and blue.

In our family it was tradition to have a birthday celebration since my dad was born on the fourth of July. We always joked that he was a Yankee Doodle Dandy but that was about all we had time for because our celebration took up most of our time in the week proceeding the fourth. There was always grass to cut and things to clean and food to prepare.

We didn't have fireworks but we did have a big party with tons of family. There was usually grilled chicken and potato salad, green beans, watermelon, metal buckets of lemonade and our favorite--blackberry cobbler.


We don't have that giant celebration anymore because my dad is no longer with us but every year I think about it and I always look for new ideas to make traditions of my own. I usually look through magazines and now I search Pinterest to see what people are doing to celebrate.

I don't think I would like to have the large celebrations of my childhood but I would like to mark the day with a few special things.

This year I may try these cheesecake bites. They look kind of easy and I love this idea above from cooking classy.com.


I have never been a big S'mores maker but I like the way this looks above. I think it would be fun to roast the marshmallows over an open fire. This is from lovethispie.com.


I'm not sure I like the red, white and blue drinks I have seen lately but I think adding blue food coloring to some lemonade with watermelon star stirrers would be perfect. Of course I think you can't beat iced tea with mint leaves. It might not be the right colors but sure is refreshing!

The photo above is from july4thdrink.com but it looks like it may be from the decorated cookie blog.


I LOVE this trifle which looks like it is made in a spring form pan. I will try this. See more on lovethisspice.com


This cupcake must have tons of food color! I love it anyway because one of them would be fun to eat. See it at oneordinaryday.wordpress.com.


My favorite idea is from theyarecrafty.blogspot.com. I think this is a winner. I am not a hot dog fan but this hot dog recipe makes me want to get out some biscuit or crescent roll dough and try it. Look simple and looks like something kids would love. The cheese cones on the top of the "bottle rockets" are perfect.

I love these ideas. They fit into my "keep it simple" July 4th philosophy and with only two days to prepare, I think I could manage a couple of these ideas.