
For Elijah's birthday party we had to make our own pinata. We couldn't find an angler fish pinata. There were sharks and tropical fish, any of which would have worked, but he had his heart set on an angler fish. When he looked at me with those baby blues and said, "We can make one," in his best pleading tone, I knew I had lost that battle. We got to work and made one that made him quite happy. At the party he told everyone, "I made this." They were impressed.

We decided that a blown-up balloon would make the perfect base for our angler fish.
We mixed up our own glue from 2/3 cup plain white flour, 5 cups of water and 2 tablespoons of sugar. There are SO many recipes out there and I usually like mine a bit thinner than some of the recipes, but any of them will do. The glue tends to thicken when it cools and I like being able to brush the glue on rather than slather it on.

I also think that a cooked glue is stronger than one you just mix up without heating. Uncooked glues can also be much more lumpy, but that can be helped by using a wire whisk to stir the flour into the water. I will give a more detailed recipe below at the end of this post.
We covered the floor with paper and then tore out unprinted newspaper to make the fish. There is nothing at all wrong with printed newspaper. It is a great use of recycled materials.

We added a tail onto the fish and fins out of just flappy papier mache. After the fish was dry, we added the finishing touches. Perhaps the easiest part was gluing on the streamers we purchased at the party supply store. The main part of the angler fish was just the rounded form. While looking on the internet we found that they come in so many shapes so you can use your imagination on the shape of the balloon. Don't forget to add a hanger. Any kind of metal hanger worked into the papier mache will do. I think a strong piece of wire would be the best.
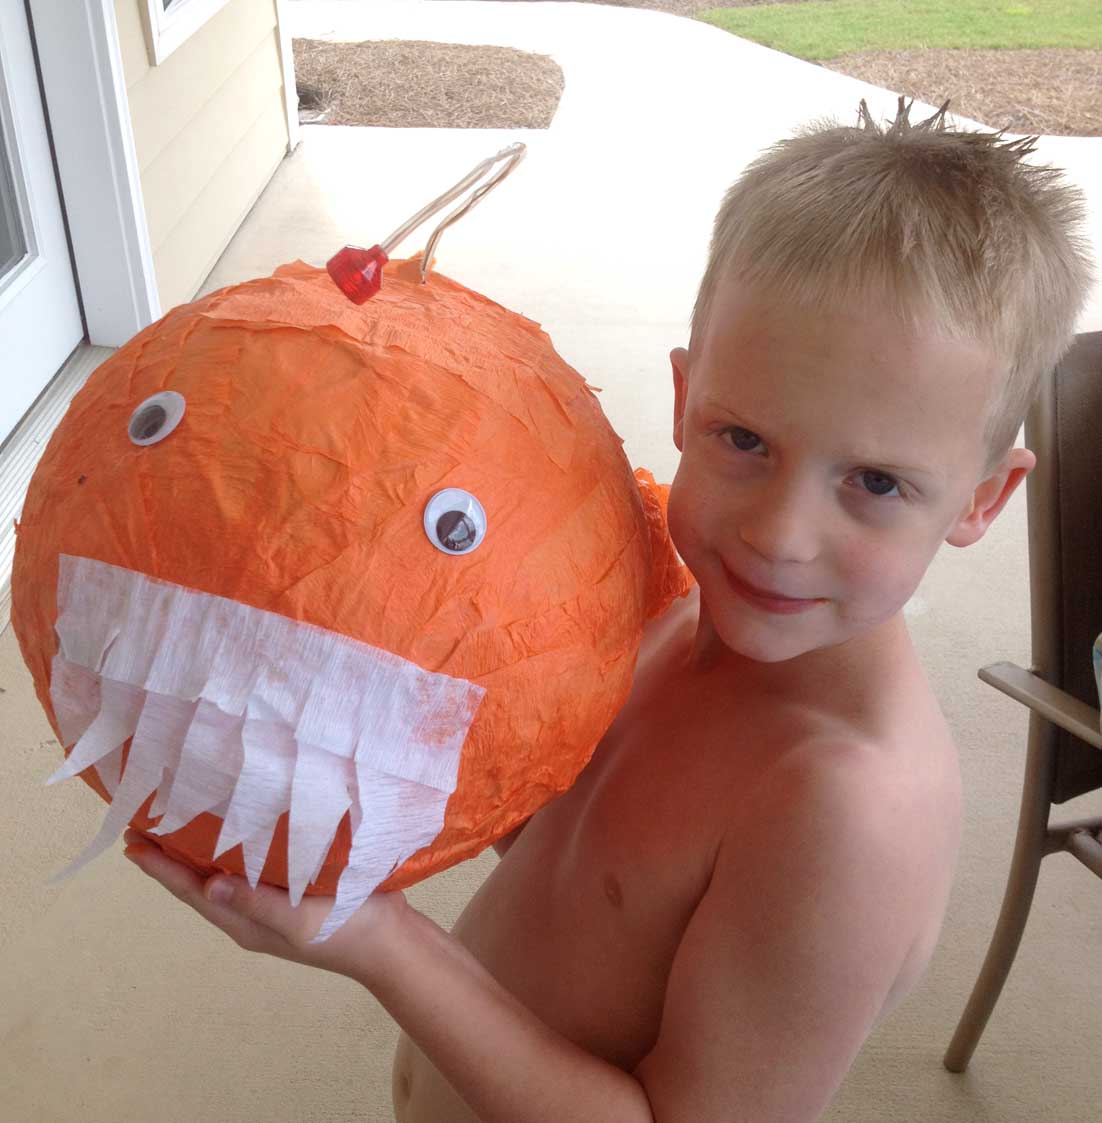
We glued on wiggly eyes and white streamers for the teeth. I cut a hole in the top, added a book light and filled it with Rice Krispy treats, fruit snacks and assorted candies. I think some of the parents really like the rice treats. One of the little girls was talking about how she like them and announced that she was going to save one of hers for breakfast the next morning. I'm not so sure the parent would agree with that at breakfast time and I am glad I didn't have to fight that battle! Kids are so funny and sweet!

The other neat party idea was the favor. We purchased small sand buckets and tied a helium balloon to the top. We purchased small beach balls, squirting fish and assorted treats including the mini frisbees and made some buckets for boys and some for girls. We ordered most of these items online and saved money by doing this. The kids really, really loved the favors which included pinata treats.
One tip. If you make the ribbons very long on the balloons and then put them all outside, the ribbons could blow around and tangle. This happened to us. As people were arriving, we were untangling balloon ribbons. It wasn't what we wanted to do but some of the kids pitched in to help and we then left them all inside.
Here are my instructions:
Angler Fish Pinata
Glue (from recipe below)
1 balloon
newspaper (enough to glue on at least five layers of newspaper and enough to protect things from dripping glue and newspaper smudges)
Large wiggle eyes
Hot glue (for attaching the eyes)
Knife and scissors to cut out a flap to insert the light and the candy
1 book light
Masking tape to hold the book light in place
Streamers of the desired color
Wire for the hanger
Enough candy and treats to fill the pinata
In a bowl mix 1 cup water and the flour. Stir with a wire whisk until there are no lumps. Add the remaining four cups of water to a saucepan and heat on medium. Pour the flour and water mixture into the saucepan of water and bring it just to a boil. Using a wire whisk will continue to prevent lumps. Mixture should become much thicker. Remove from stove and add sugar. Allow to cool before using.
Blow up a balloon and tie a knot in the end to hold in the air. Apply paper and glue with a brush or with hands to the balloon. I like to use the glue liberally. Make around five layers and then hang the project by the "tail" of the balloon until it is dried. Be sure to work in a hanger.
If you want, add extra layers. It will be quite hard when dry. Fashion a flappy tail and fins from papier mache. Allow to dry.
Carefully glue on streamers with paste. The streamers break easily when wet. Be sure to add streamers over fins and tail. Allow that to dry.
When fish is fully dry, cut a flap in the top to attach book light and cut a hole large enough for the light to come through. You will want to cut a slit over the switch of the book light so you can turn it on. I used duct tape to hold the light in place.
Make little cuts along the edges of the streamers on the tail and fins to give them a tasseled look.
Use hot glue to attach the eyes.
Attach the teeth with white streamers and then cut the streamers into jagged points.
Add candy and glue streamers over the flap to hide the opening.
The fish is now ready for the party.
Note: Homemade pinatas are not quite as strong as store bought ones. It would be best (and safer) to use a plastic bat.

What a wonderful pinata! I love all the photos and the directions you included - very neat.
ReplyDeleteAnd just like the TV commercial: memories of making the pinata = Priceless! Between the pinata and the birthday cake, 'undersea fishing' has never looked so good. Hope you and your family have a great weekend, Joanie